
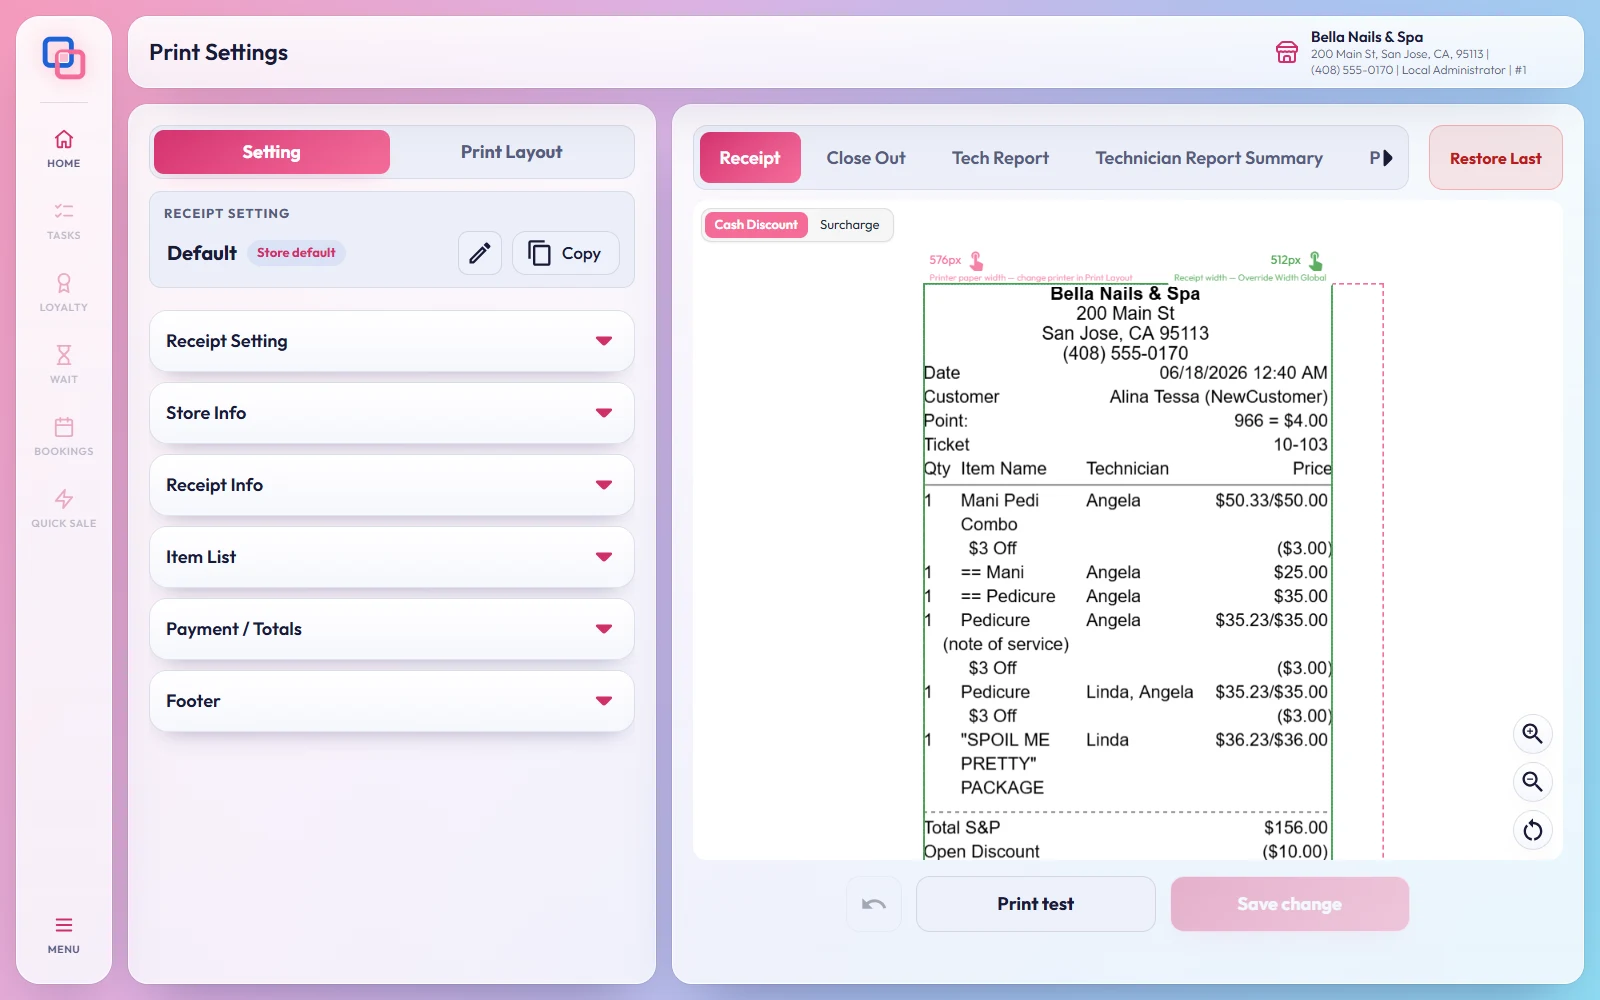
Print Settings is where you lay out everything EraPOS prints: the customer receipt, the close-out and technician reports, payroll slips and more. Each change shows at once in a preview, and Print test prints it on your receipt printer before you save.
Before you start
- The password of an employee with full access, such as the owner.
- The EraPOS app on a register with the printer: printing does not work from an ordinary browser tab.
- A receipt printer connected and working. See Connect a receipt printer and cash drawer.
Open Print Settings
Tap MENU on the side rail, open Administration and choose Print Settings. The settings are on the left and the preview on the right. Across the top of the preview are the tabs for each printout: Receipt, Close Out, Tech Report, Technician Report Summary, Payroll, Quick Payroll, CC Slip, Print Appt, Gift Card, Work Order, Check-In Ticket, Services Paid and Work Order Summary.
Lay out the receipt
On the Receipt tab, work through the sections from top to bottom:
- Store Info: your logo and where it sits (Align left or Align top center), the font size, and Show Phone Number.
- Receipt Info: the rows under the header, such as Date, Customer, Loyalty Balance and Ticket Number.
- Item List: the services and products, with Expand Row Spacing and Extra Lines Per Row (1-5) for more room.
- Payment / Totals: how payments and totals are printed.
- Footer: up to four messages (Message 1 to Message 4), Show Policy with your policy text, Show Tip Guide, and Show QR Code with a QR Code URL such as your website or social page.
Set up the reports
The Close Out tab sets each part of the end-of-day report, such as Payment Summary, Cash Reconciliation, Discounts, Voids and Gift Card Sales, each with its own font size and weight. The Tech Report tab sets the technician report: its header, Item Sales Details and Summary, with Show Customer Name, Show Type of Ticket and Bold Customer Name. The payroll tabs do the same for pay slips.
Match your printer, test and save
Switch to Print Layout at the top of the settings to choose your printer model (for example Epson 80mm or Epson 58mm) and the width and margins. Then tap Print test: it prints the tab you are looking at, with sample data. The undo button undoes the last change on that tab, and Restore Last brings back what was saved. When the test looks right, tap Save change.
The picker above the sections shows which receipt setting this register uses. You can make a copy with its own name, for example for a register with a narrower printer.
Result
Receipts and reports print with your layout from the next ticket on. If a printout comes out blank, too small or not cut, see The receipt printer is not printing.
Last reviewed October 2026. Tell us if something is out of date.