
Start a ticket from the Main Queue or open one from the SERVICE tab, add the services and products with the right technician on each line, then choose PAY, take cash or card and close the ticket. The receipt prints the way your registers are set up.
Before you start
- The technician has clocked in, so they appear in the MAIN QUEUE.
- Your POS password, if your role or your store's settings ask for it.
- For card payments, a card reader set up for this register.
Steps
- Start or open the ticket
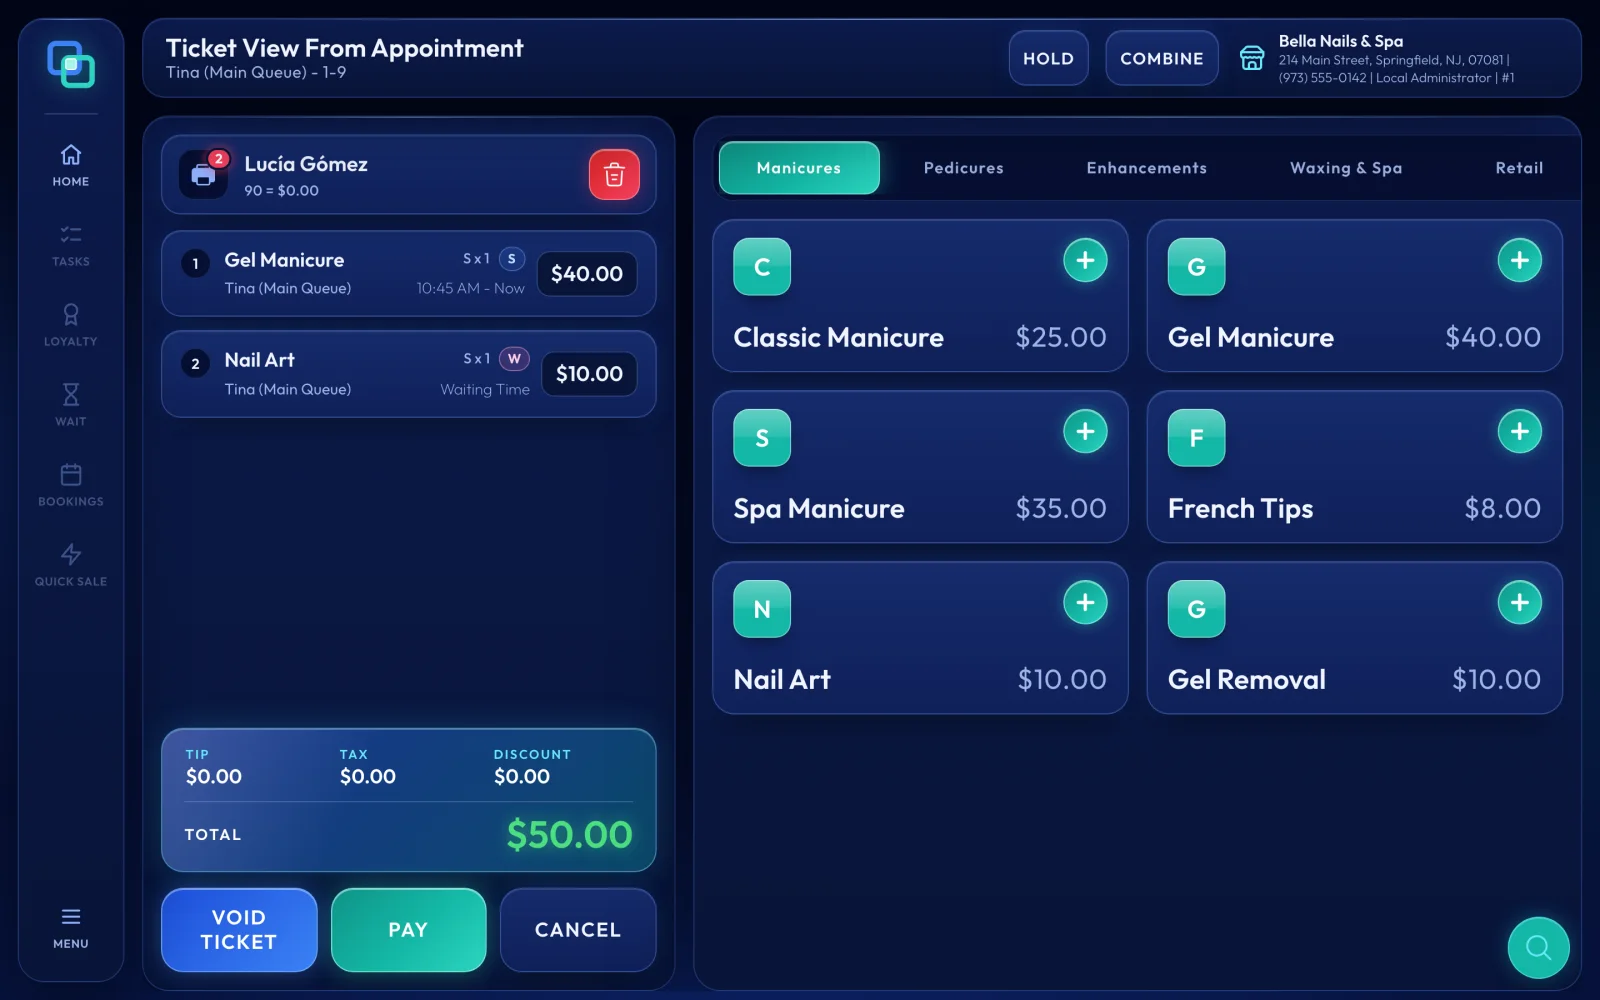
On the Service Board, tap a technician in the MAIN QUEUE to start a new ticket for them. If clients are waiting, EraPOS may show Create Ticket: pick the client and choose CREATE TICKET, or choose SKIP for an empty ticket. To continue a ticket that is already open, tap its card on the SERVICE tab.
- Add the customer
Tap Select customer at the top of the ticket and type their phone number or name; a new client can be created from there. With a customer on the ticket, the visit lands on their record and they can earn and use loyalty points.
- Add services and products
Pick a category tab on the right and tap each service or product, or type in Filter by service name. Each item goes to the ticket's technician; if that technician does not do it, EraPOS asks you to Pick Other Technician.
- Check the technician on each line
Tap a line to select it, then tap another technician on the right to give them that service. With a line selected you can also use QUANTITY, CHANGE PRICE, REQUEST (a note for the technician), DISCOUNT ITEM or VOID ITEM. SHOW MENU brings the menu back.
- Choose PAY
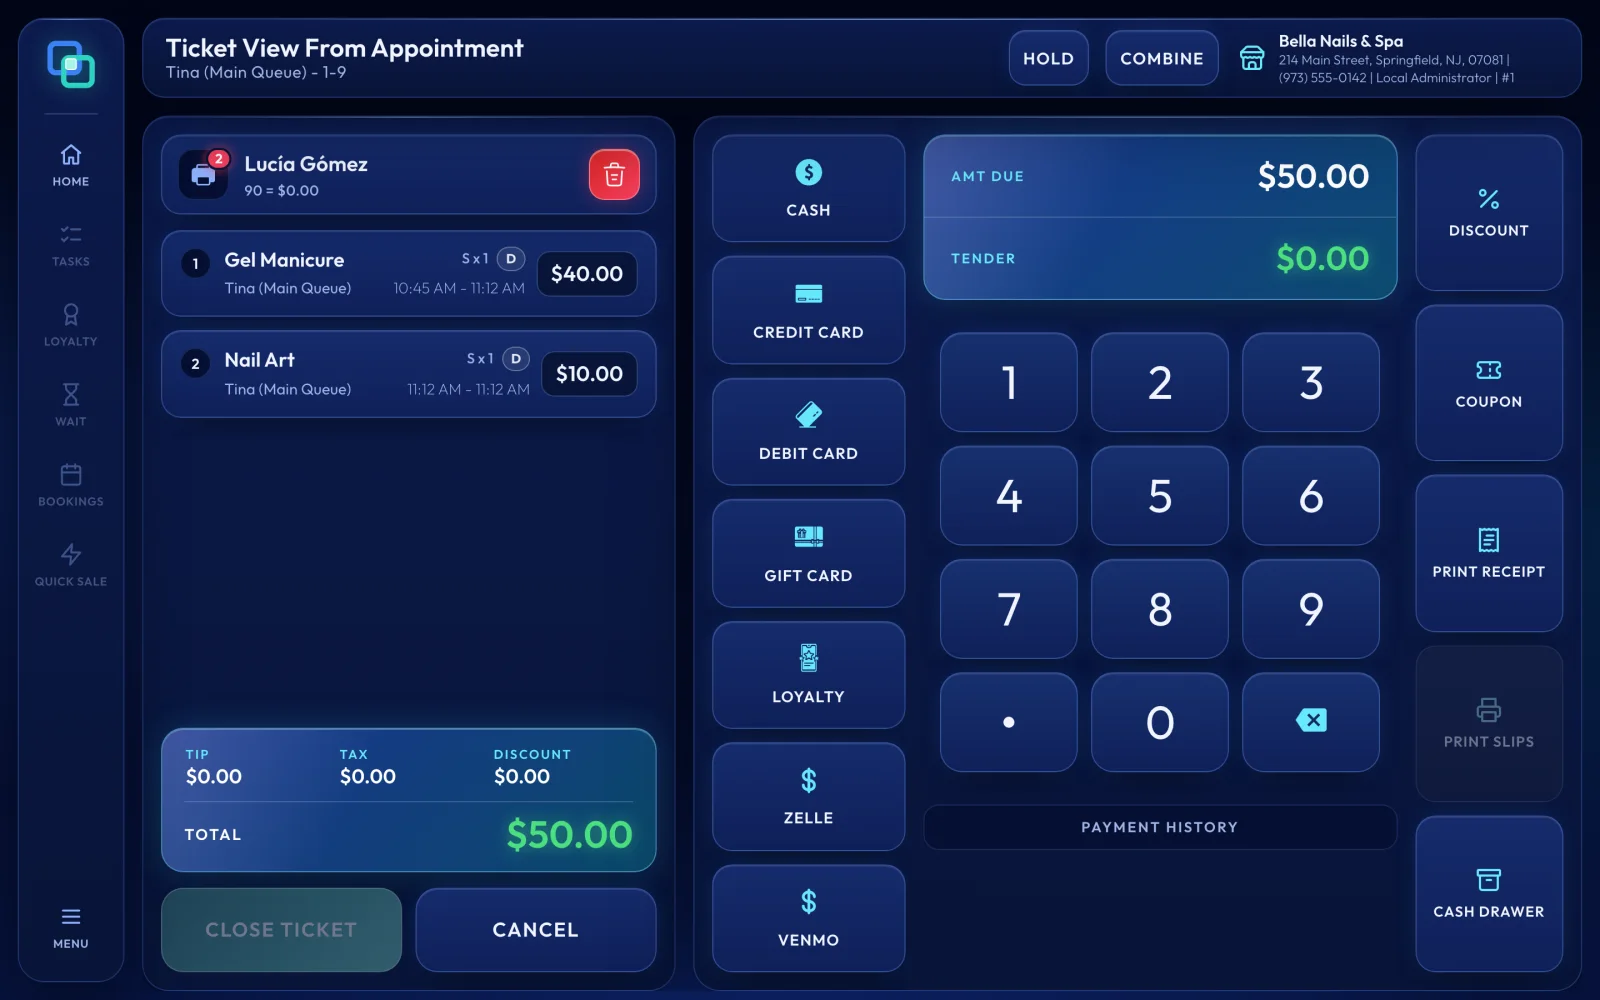
The payment screen shows AMT DUE, a keypad for the TENDER, your payment types and the PAYMENT HISTORY. If the customer has enough points for a reward, EraPOS may offer to redeem it first.
- Take the payment
For cash, type the amount the client hands you (or leave the keypad empty for the exact amount) and tap the cash payment type: the drawer opens, and once the ticket is covered Change Due shows the CHANGE. For a card, tap the card payment type: the amount goes to the reader, and Cancel payment stops it. To split the bill, type part of the amount first and pay the rest with another type.
- Close the ticket
When the ticket is paid in full, choose CLOSE TICKET, or Close Ticket on the Change Due window. If a card tip has to be shared between technicians, SPLIT TIP comes first.
- Print the receipt
Depending on your register's settings, the receipt prints by itself, EraPOS asks Do you want to print the itemized receipt?, or nothing prints. PRINT RECEIPT on the payment screen prints one before closing, and the TICKETS tab reprints it later.
Result
The ticket is closed and EraPOS returns to the Service Board. The ticket leaves the SERVICE tab and is listed under TICKETS with its payments, tips and technicians.