

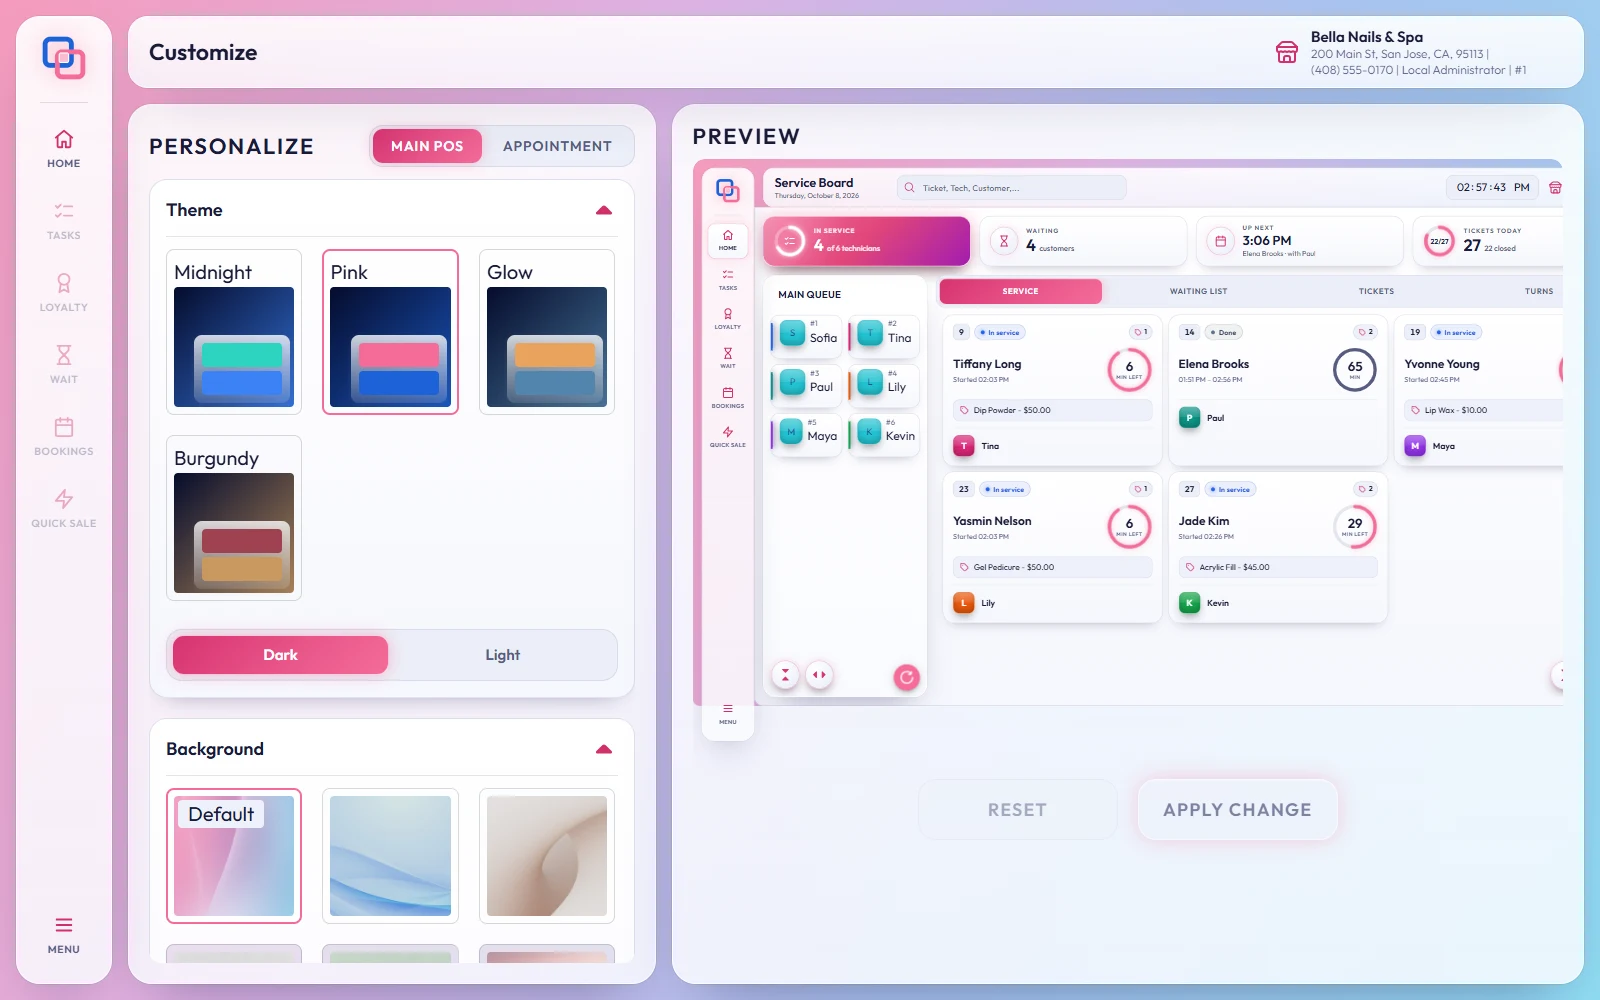
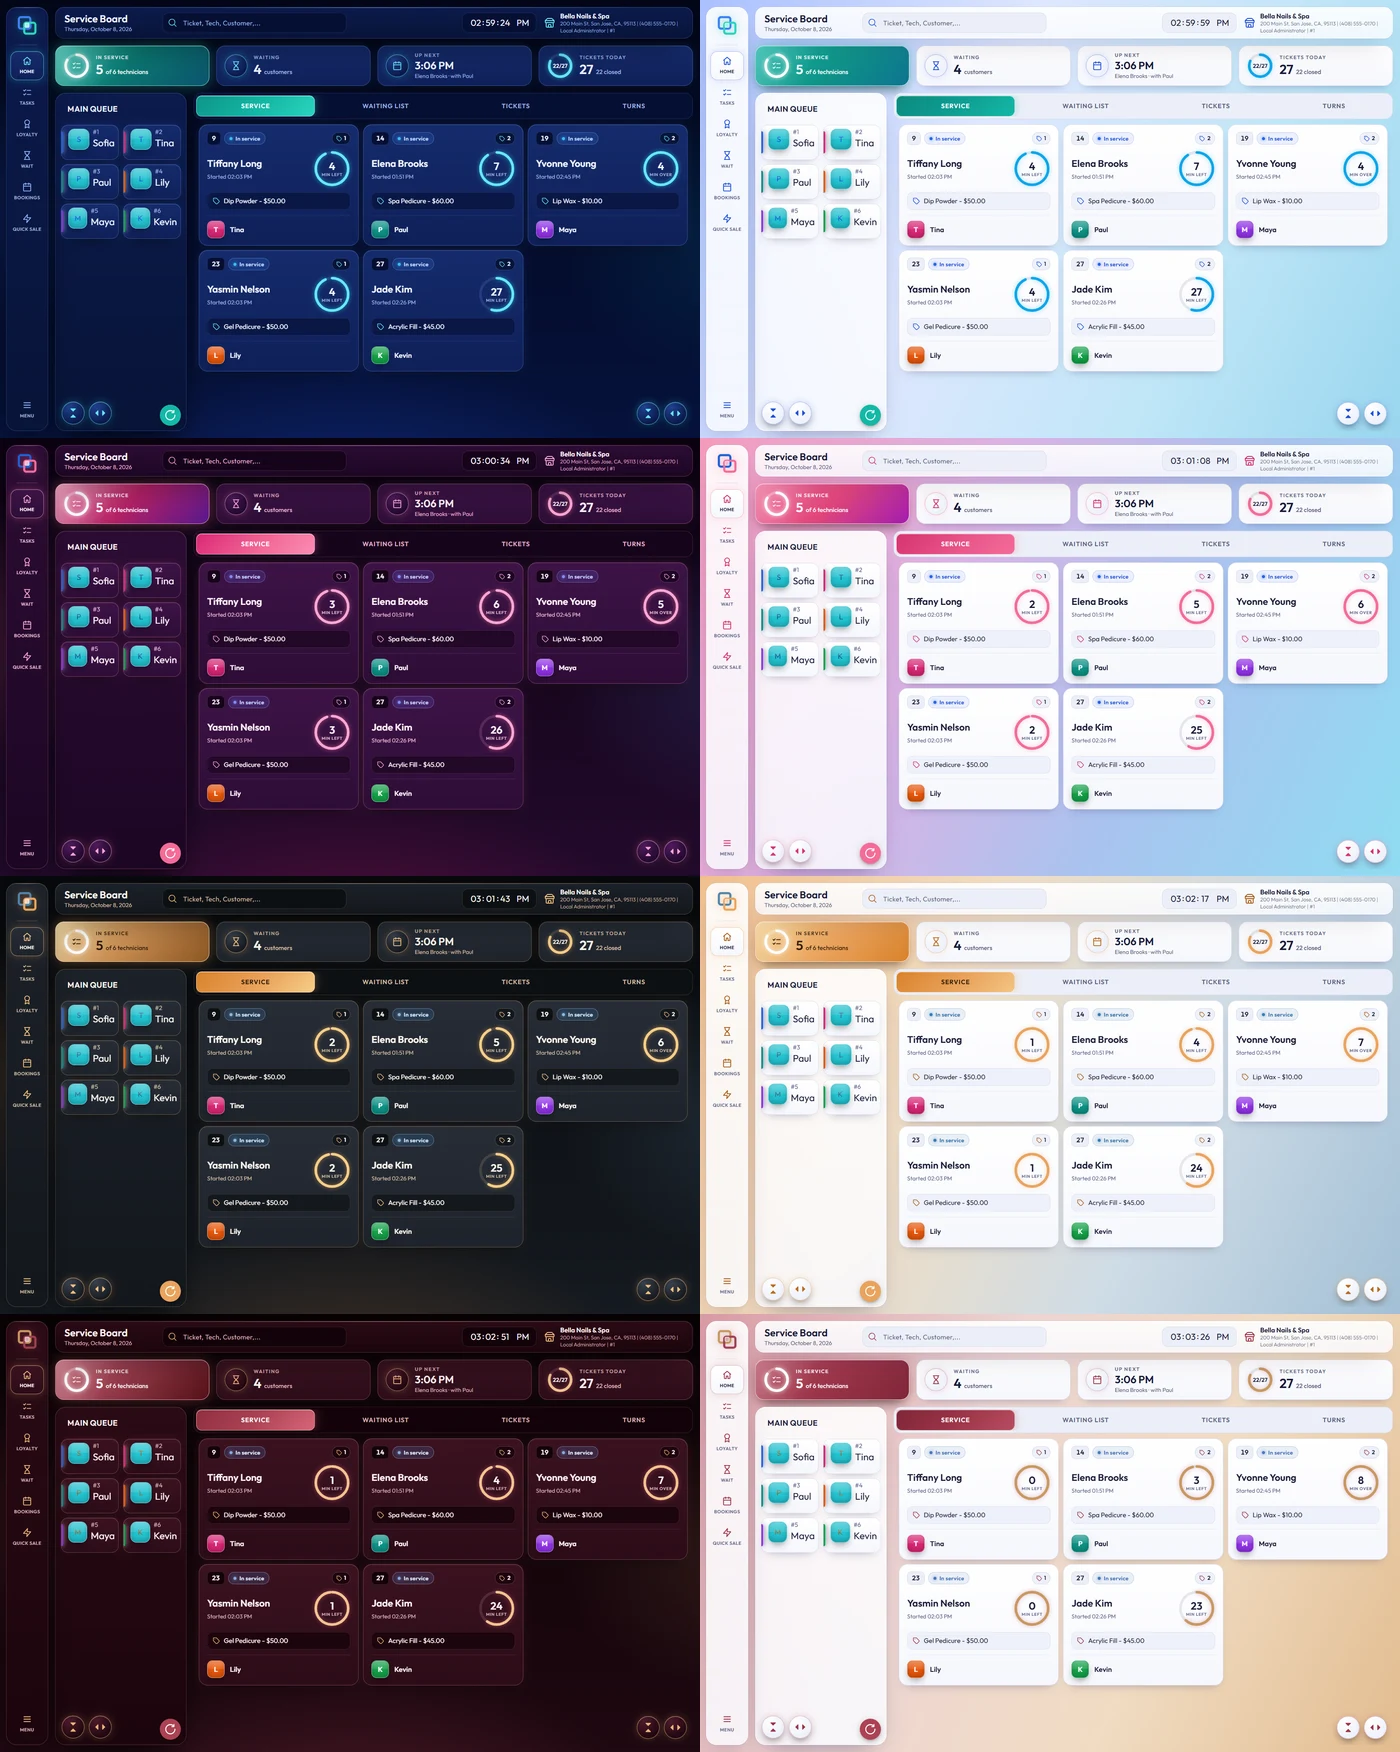
EraPOS comes in four themes, Midnight, Pink, Glow and Burgundy, each in a dark or a light tone. Under MENU › Administration › Appearance you choose a theme, a background and the text sizes, see them in a live preview, and apply them with one tap.
What it does
Appearance changes how the POS looks, never how it works: tickets, prices and reports stay exactly as they are. It opens the Customize screen. Its left panel, headed PERSONALIZE, has two tabs: MAIN POS for the Service Board and APPOINTMENT for the appointment book. Each setting has its own section:
- Theme: Midnight, Pink, Glow or Burgundy, then Dark or Light.
- Background: the theme's Default picture, one of the pictures that come with EraPOS, or your own. Tap the + tile to add a JPG, PNG or GIF, then crop it to fit and tap Crop & Upload.
- Main Menu: a text size and a text colour.
- Technician Font Size: technician names in the Queue and on each Ticket.
- Waiting List: its Font Size. Customer List: its Row Height.
- On the APPOINTMENT tab, Tooltip sets the size of the Customer Name and Services, and Right Panel sets that panel's Width.
Every change shows straight away in the Preview beside the settings, so you can judge it before anyone at the front desk sees it.
Where to find it
Tap MENU on the side rail, open Administration and choose Appearance; the Customize screen opens. Only an employee with full access, such as the owner, can open it, so EraPOS asks for that password first. Make your changes, then tap Apply Change; EraPOS confirms that the theme was applied. Reset goes back to the look you applied last. Both buttons wake up as soon as you change something.
Tips
- Try Light at a bright front desk and Dark in a dimmer room or in the evening.
- Choose a calm background picture, so ticket cards and names stay easy to read.
- If staff read the queue from across the room, make the technician names in the Queue bigger.
- Pictures are cropped to a wide shape, so a landscape photo works best.
- To remove a picture you added, tap the cross on its tile.
Note
A background picture you upload is saved on the register where you added it. To use the same picture on another register, add it there too.