

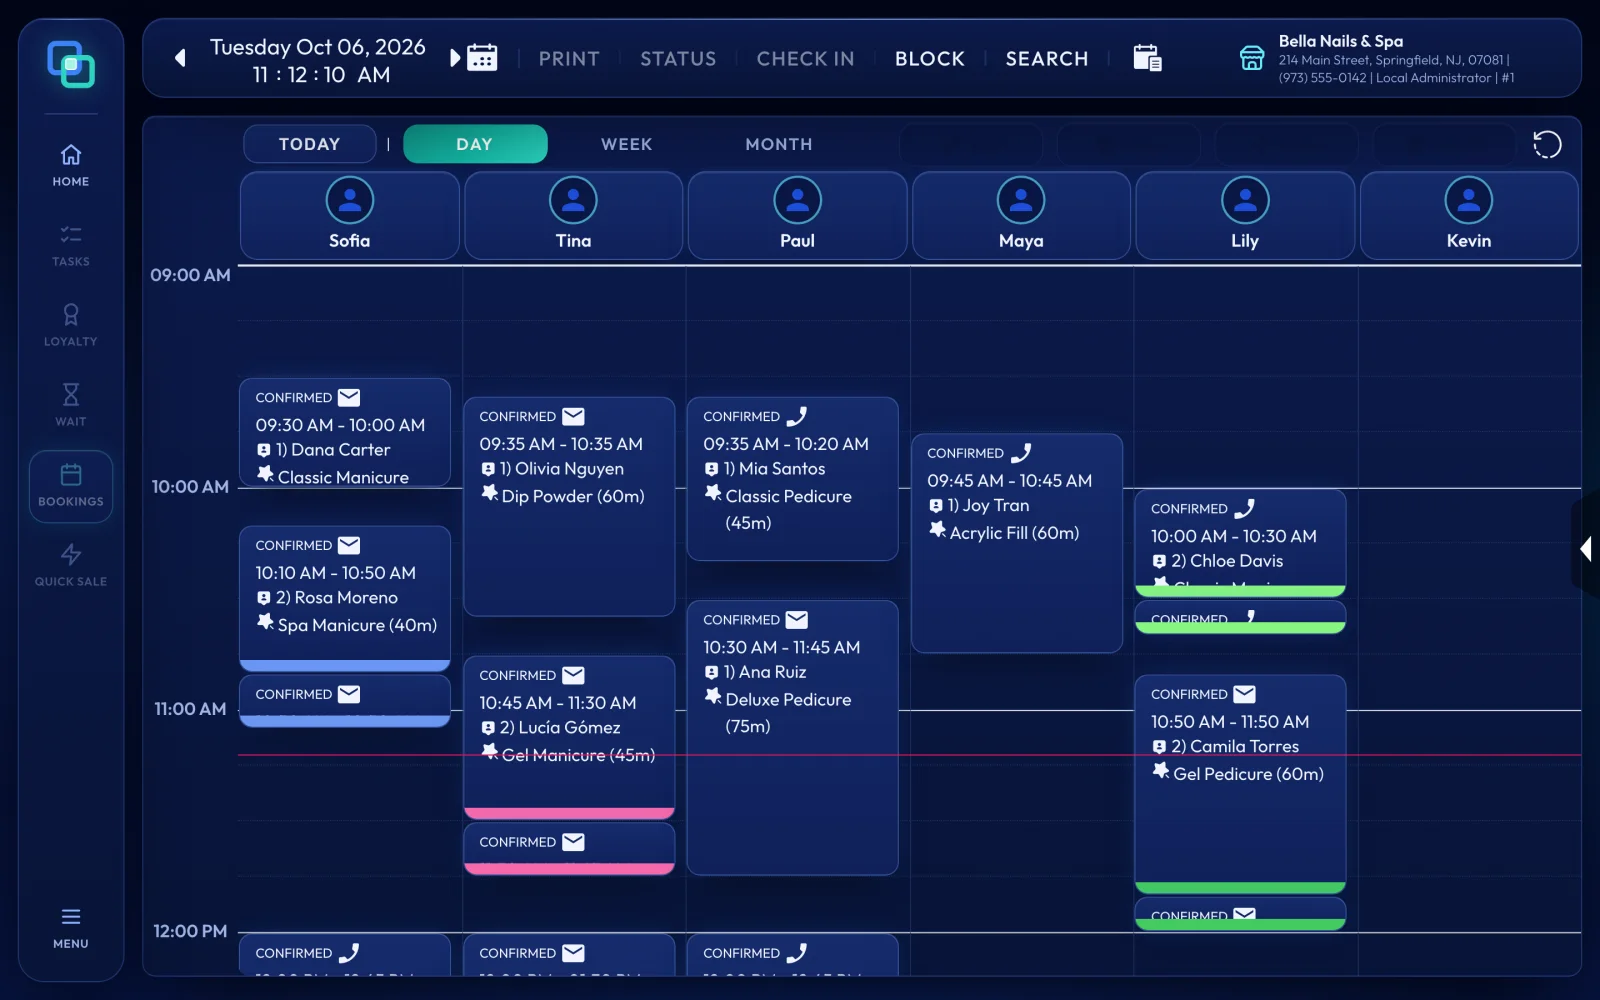
Tap BOOKINGS on the side rail, double-tap an empty time in a technician's column, choose the client and services, and tap SAVE. The same book lets you move appointments, check clients in and block time.
Before you start
- Each technician who takes appointments has Appointment Book turned on in their employee record, and their working hours set under Schedule.
- Your services have a duration (see Set up your menu: categories, services and products).
- You are on the home board: the rail buttons other than HOME and MENU work only there.
Steps
- Open the book
Tap BOOKINGS. The book opens on today in day view. Switch between Day, Week and Month, use the arrows beside the date to move a day, a week or a month, and tap Today to come back.
- Start a new appointment
Double-tap an empty time in the technician's column. The Create Appointment form opens with that technician and time.
- Choose the client and services
Type the client's phone number or name in the customer search, or add a new client. Pick the services; use Filter by service name to find one quickly. On each service you can change the duration, the technician and the start time. Choose the Type (New Customer, Chosen Tech, Any Tech, Walk In, Online or Misc), which also sets the appointment's colour, and add a note if needed. To repeat the visit, tap the recurring icon and set how often it repeats.
- Save
Tap SAVE. EraPOS refuses a time when the technician is not working, a technician booked twice at the same time, or a date in the past, and tells you why.
- Move an appointment
Drag it to a new time, or into another technician's column to change the technician. It must stay on the same day and inside that technician's working hours. To change anything else, double-tap the appointment to open it.
- Check the client in
When the client arrives, tap the appointment and then Check In at the top of the book. EraPOS creates the ticket with the services in service and opens it. This works for today's appointments, and the technicians must be clocked in. A client who checks in on the tablet confirms the appointment there instead.
- Block time
Tap Block. Choose the technician (or All Technicians), then All Day or a Quick Duration from 15 minutes to 3 hours (or Custom), check the start and end, add a Reason block such as "Lunch", and tap Save. Blocked time is also closed to online booking.
- Delete an appointment
Open the side panel with the small button with a triangle at the edge of the book. Its Main tab shows the selected appointment with Edit, Copy, Move and Delete. Tap Delete and confirm. The Cancel tab lists cancelled appointments, such as bookings a client cancelled online; REBOOK puts one back on the book.
Result
The appointment shows on the book in its type's colour, on every register and in the technician's EraPOS Hub app. Each change is kept in the Appointment Log (the log icon at the top of the book). To read the colours, see Appointment colours and statuses.